(great, now she’s going to stare at me while i work…)
Awaken your inner serial killer, because it’s time to start cutting things up! I find it easier to detail up small pieces of a sculpt when they’re separated from the main body. It’s nice to be able to scrutinize things in your hand and work every angle without the rest of the sculpt getting in the way. Everything will need to be separated into pieces once I reach the casting stage, anyway.

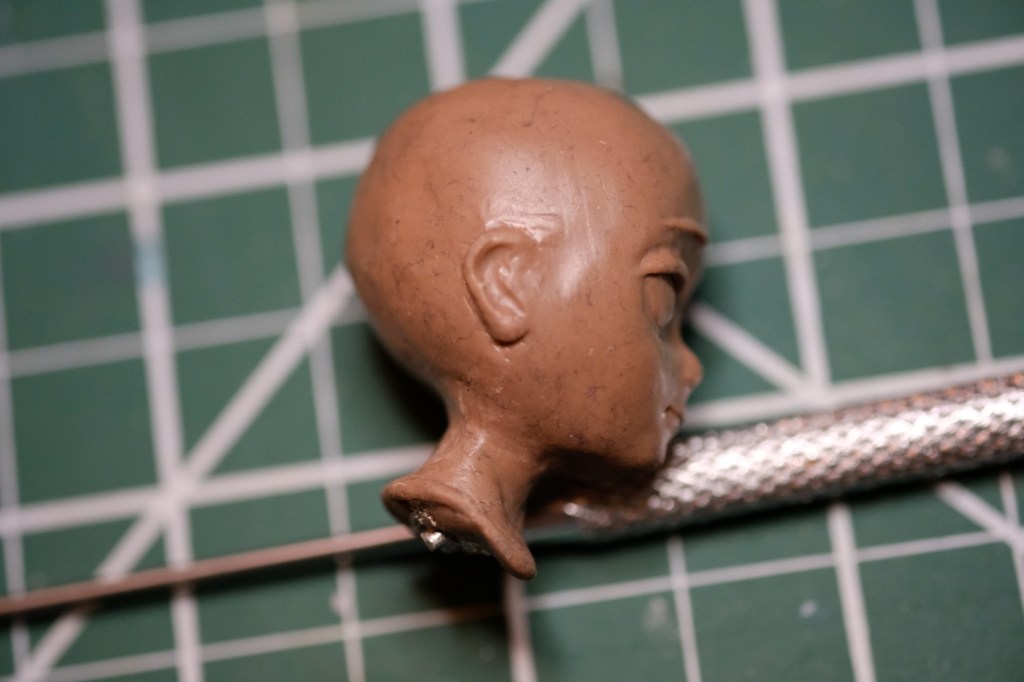
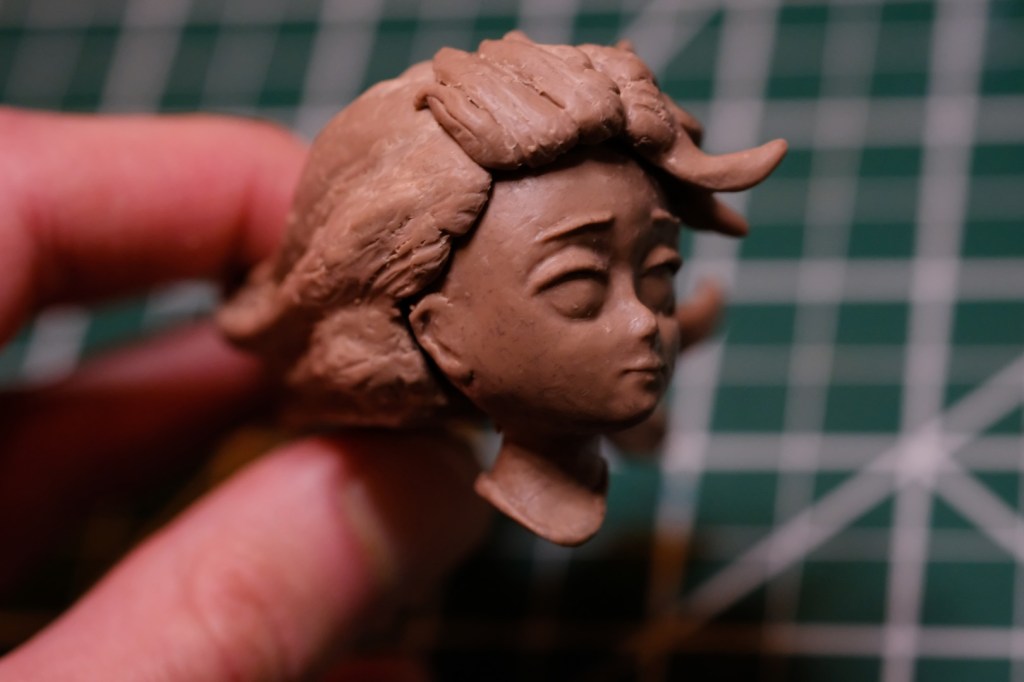
Off with her head! With a jeweler’s saw I cut along the neckline and separated the head from the body. I’ll patch up the back of the collar later. You can see the wire armature and the foil filling revealed in the cross-section. Kinda cool, in my opinion.
Putting the seamline right at the collar makes the gap less prominent in the finished build, as well as allowing the skin and the clothes to be painted separately for an easier paint job. There’s no painting task more annoying for me than having to mask off tiny, irregularly-shaped sections of the sculpt so I can get clean color separation between them. I’d go as far as to say that masking is my least favorite part of garage kit building, period. If I can avoid it on my own GK, I will.
The eyes started with small balls of clay applied to each of the eye sockets. These were then flattened and the edges massaged into a rough eye shape.

I then added little worms of clay to the top to represent eyelids/eyelashes. I wanted the eyes to look a little sleepy, so I tried to make the eyelids appear slightly droopy. After all, Yume-chan is supposed to be dreaming.
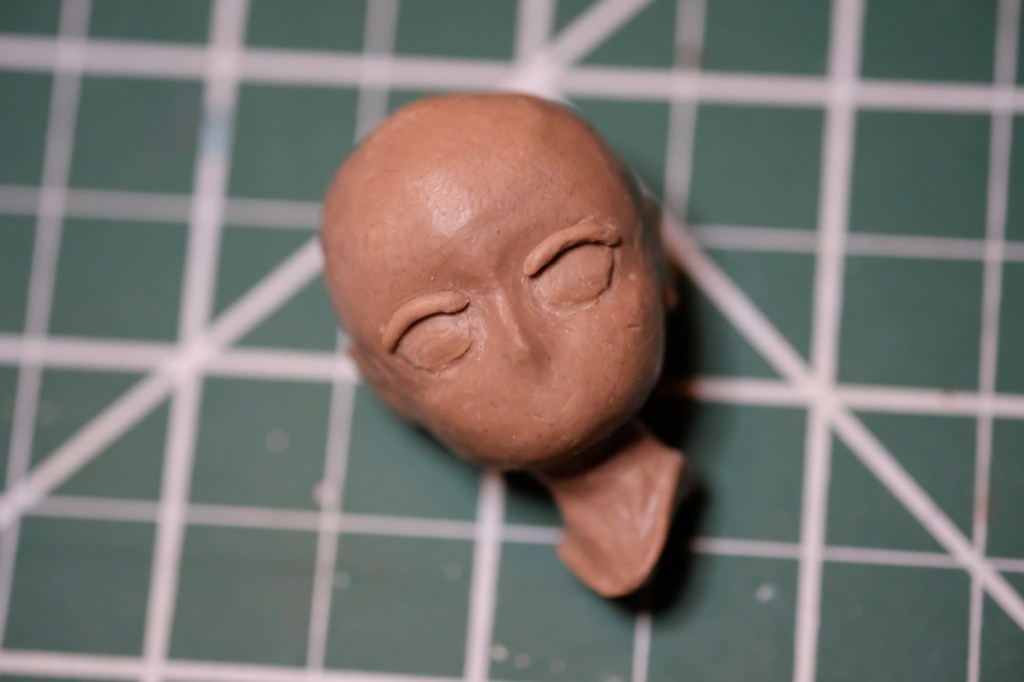
The eyebrows were the most difficult part of the face to sculpt. I started by rolling tiny threads of clay, small enough that I had to use tweezers to handle them. Even with the help of tools, though, getting the eyebrows tapered and curved in a roughly symmetrical way took some work. All they wanted to do was roll around and break into pieces, certainly none of the things that eyebrows are supposed to do!
I again ran into issues when it came time to blend the eyebrows into the face, as they kept shifting positions when I put even the slightest pressure on them. At this scale, every small movement makes a huge difference in the perceived expression. I push one way, Yume-chan looks angry. I push the other way, she gets upset. In the end, aligning everything just took patience. Patience, despite being one of the most important tools in the toolbox, doesn’t seem to be carried in any of the stores near me, and consequently I keep running out of it. Maybe I should check Amazon.

I cut a slit for the mouth and pushed out the lips a little bit. I tried to create a slightly worried expression, as if Yume-chan doesn’t quite realize that she’s in a dream and isn’t quite sure what’s going on.

For the nose, I originally intended to have an anime-style featureless nose, mostly just suggested rather than being fully sculpted in. Once I’d added the other facial features, however, I felt like it didn’t really match the rest of the face. I decided to give her a proper nose, scooping out the bottom and adding a little more clay for nostrils. Still small and cute, but at least it’s an actual nose. I guess she’s going to end up more Disney-style than anime-style.
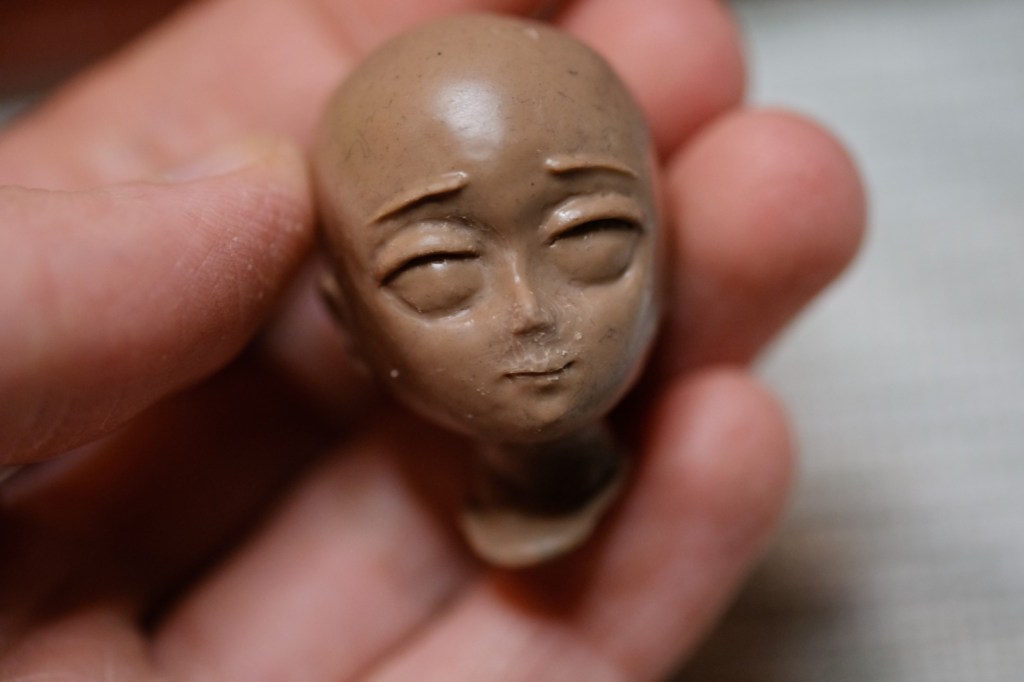
Time for more violence! This time I hit the face with an alcohol torch. This melts the surface just enough to smooth it out and reduce the tool marks. With that, the face was done (for now).

It was important to me that the profile looked as good as the front. I didn’t want to fall into the trap of sculpting for one specific angle, which can lead to a face that looks flat or wonky from the side. Thankfully, I think it turned out pretty cute.
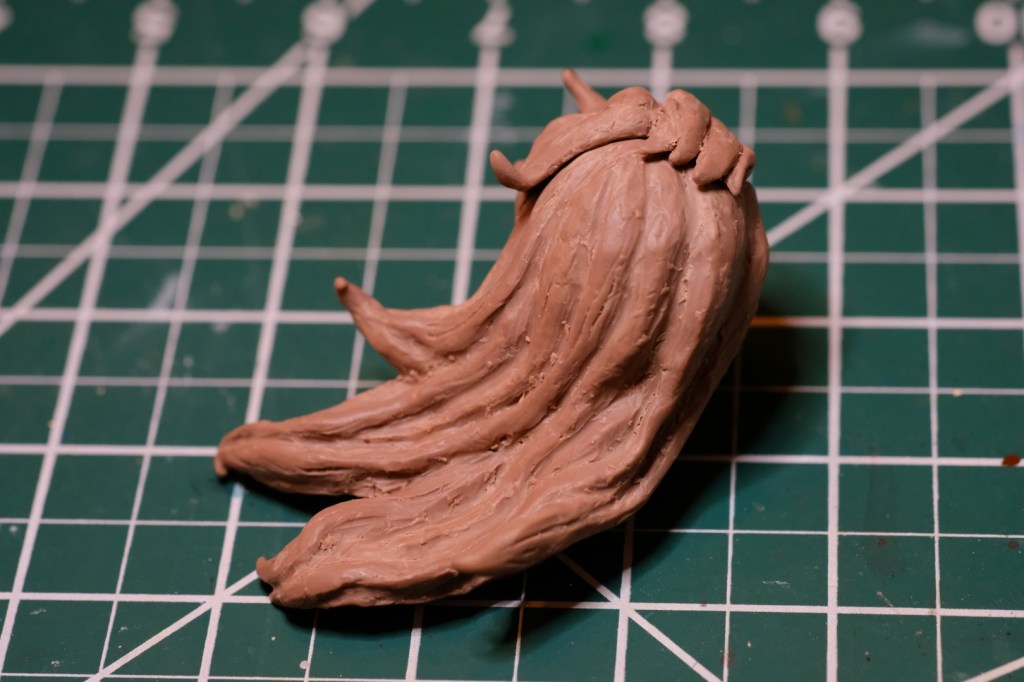
After that I moved on to the hair. While it was tempting to layer up a bunch of small daggers of clay to create many levels of depth and volume in the hair, practical concerns came first. This would have been a nightmare to mold and cast (at least for an inexperienced resin caster like me), with a high chance for the silicone mold to get caught in tight spaces and weird angles and tear. Thus, I stuck to building out the broad forms of the hair and working off of those.

Once I figured out the rough form of the hair, I added some clay strands over the surface to give it more of a, well, hair-like appearance.
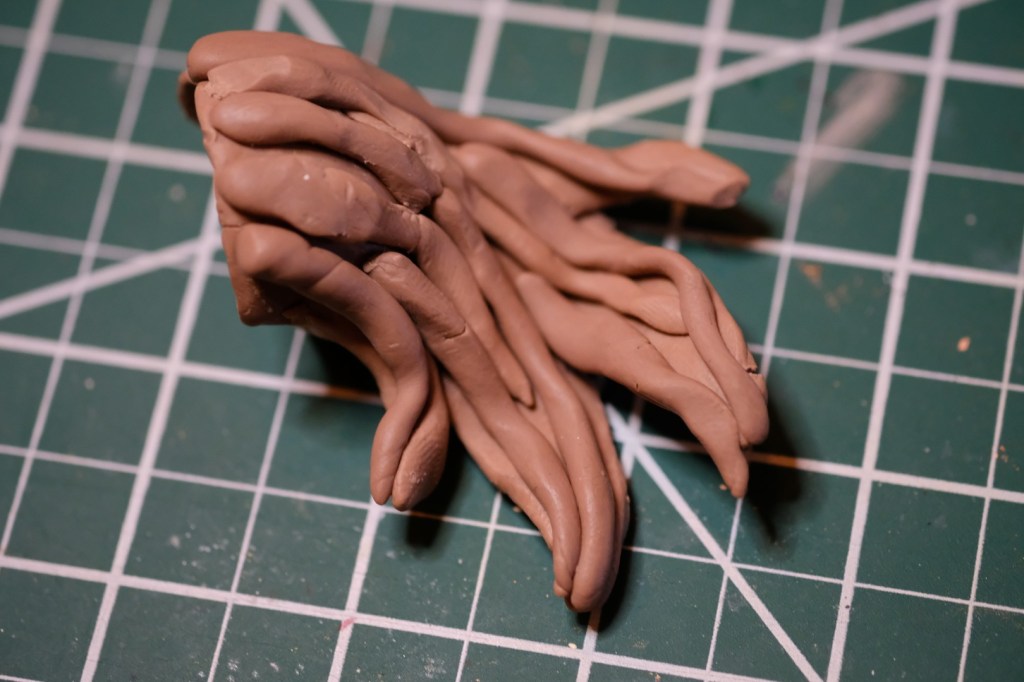
I blended these in and carved some lines to further suggest individual strands.

I wanted the bangs to look like they were being blown hard by the wind. The wind is supposed to be coming from the front-right side of her face, so I pointed the right bangs straight back and the left bangs more outward. I tried to make them look messy and wind-blown, with maybe even a bit of a bed-head vibe.

I allowed myself to get a little more detailed on the front than on the back, since the face area is such an important part of the expressiveness of the sculpt. After some tweaking and blending, this was the result:

I’ll probably mess with the hair some more, but for a rough sculpt this is fine.
The head, the bangs, and the back hair parts were all sculpted in separate pieces. Like with the neckline, this separation will make the parts easier to paint. This is especially true with the face, since the bangs drop down to cover up parts of it when everything’s assembled.

While I was at it, I also roughed out the feet. I simply made two foot-shaped blocks and then sliced the toes apart. In the picture, the two feet are in different stages of finishing: you can see that the toes on the left foot have been rounded off and refined compared to the right foot.

Next up: the hands! I haven’t quite settled on what I want them to be doing, but I have a couple of ideas that I’m juggling. As often happens, my creative indecision stops me in my tracks. I’ll settle on something soon…

Leave a comment