(the more mistakes you make the more the mistakes make you)
My first attempt at mold-making ended up being riddled with issues. Surely, then, with those lessons learned, the second attempt went off without a hitch!
Yeah…
Before we get to that, though, let’s look at the quick update I made to the guinea pi–I mean, the ghost. I wanted to tackle a more detailed sculpt this time around. To that end, I decided that the ghost had earned a crown. It’s just a rough sculpt, but that’s fine for a test piece, and honestly a little roughness seems kinda appropriate for the undead. I think it suits the ghost royally:
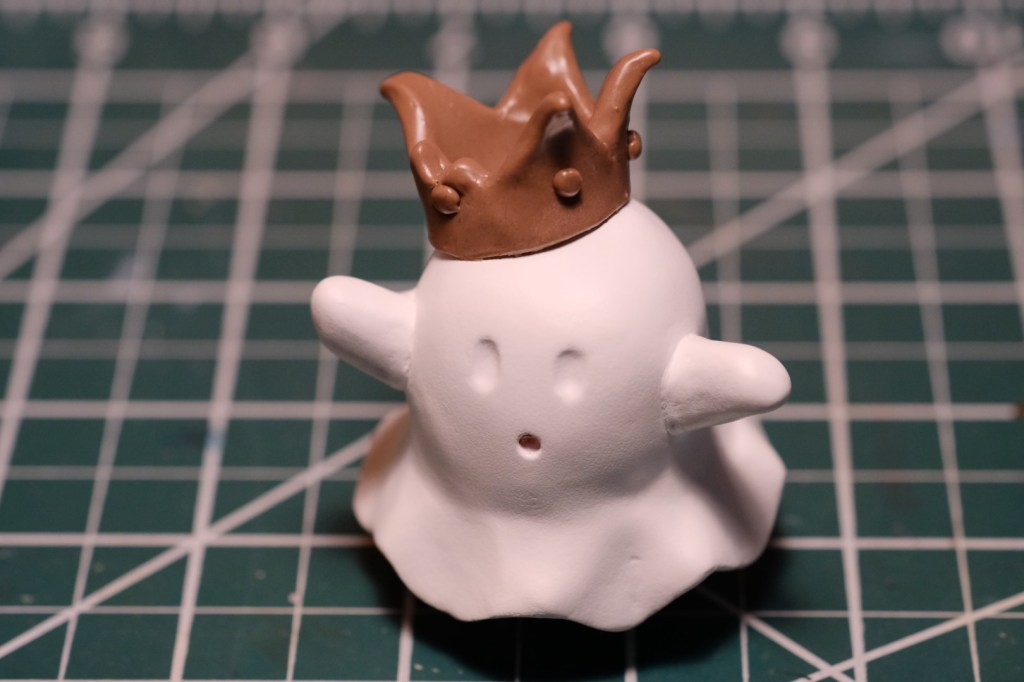
Doesn’t he deserve a little pampering after all the mess I’ve put him through (and will still put him through 🫣)? I sculpted one of the points of the crown to look broken off, though I like to think it was whole in the ghost’s past life. It’s fun to suggest little stories with these details, and I think it adds a lot of interest to a sculpture. What fateful event might have led to this damage? If I don’t actually have an answer to that question, does that make me a hack?
The original ghost, by the way, was inspired by a design in the book “How to Build Garage Kit, Vol. 01” (no I didn’t miss an s, that’s exactly how its written), which, aside from the title, is entirely in Japanese, but which does give a great overview of the otaku-driven side of the garage kit hobby. My eyes glaze over trying to read it, but at least the pictures are easy to follow! If you want a copy, you’ll probably have to look on Japanese websites. Good luck.
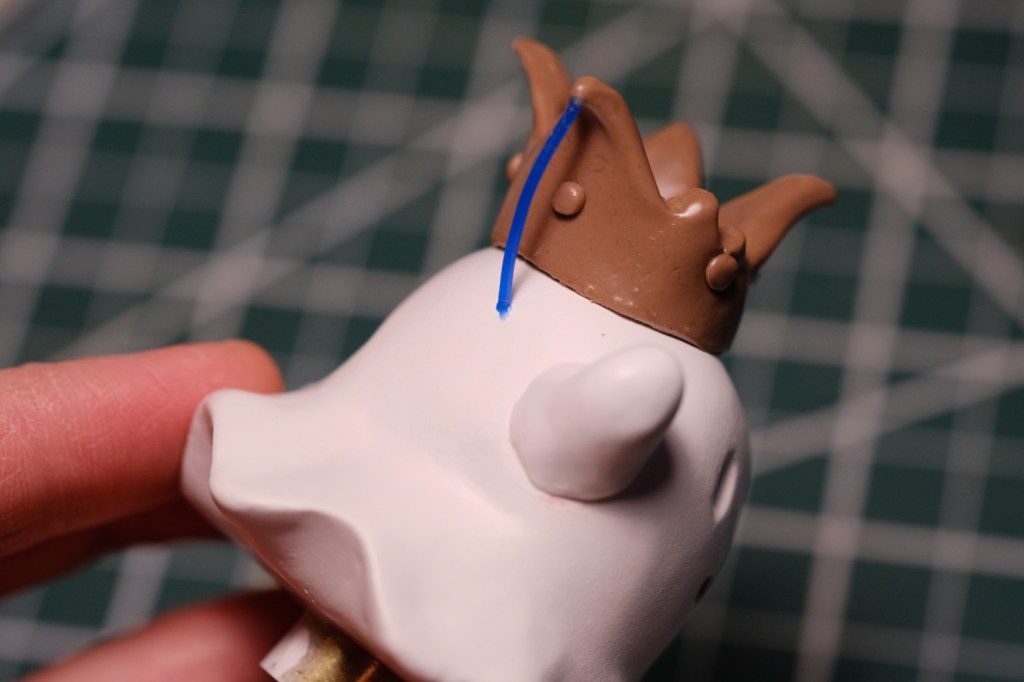
Since the crown was in place, it was time to add channels for the resin. Keep in mind that I won’t be injecting the resin with pressure here; I’ll simply be pouring it in, and if there are any places that the liquid resin can’t reach through gravity alone, the casting will end up with air pockets. In this case, I identified a couple of points on the crown that seemed like they could be problematic.
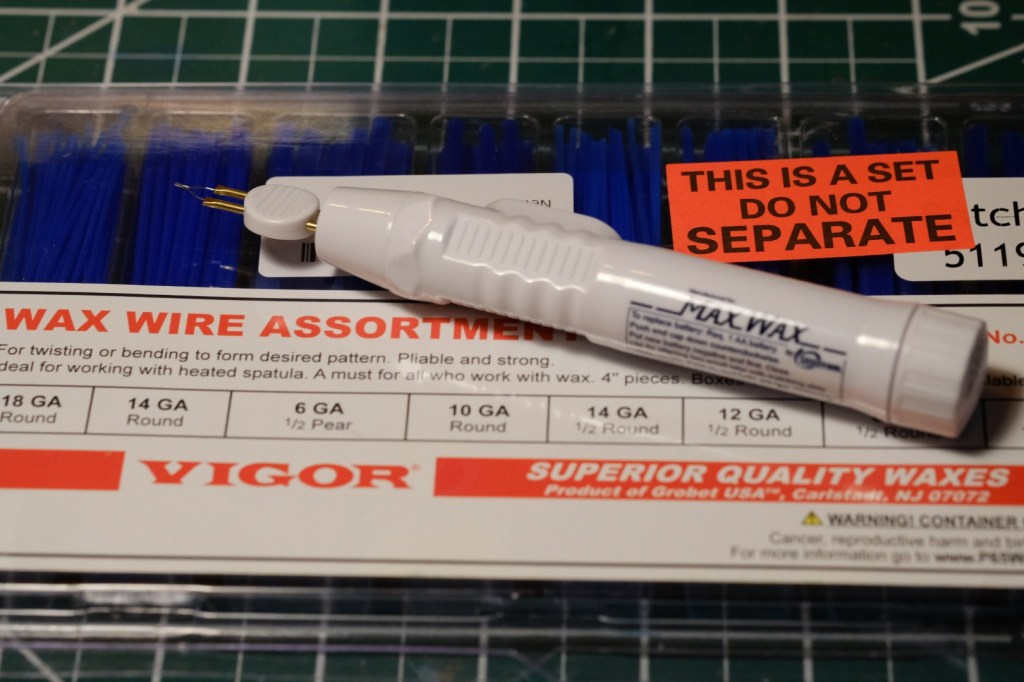
To fix this, I added some thin wax wire to bridge the gap between the points and the body of the sculpt. This should let trapped air flow out of those points and bubble up with the rest of the air. I melted the ends of the wire onto the surface of the sculpt with a wax pen (which is basically just a handle with a heating element on the end). This was the first time I’d tried working with wax wire and the wax pen, but I found them quite intuitive. If only everything just made sense like that…
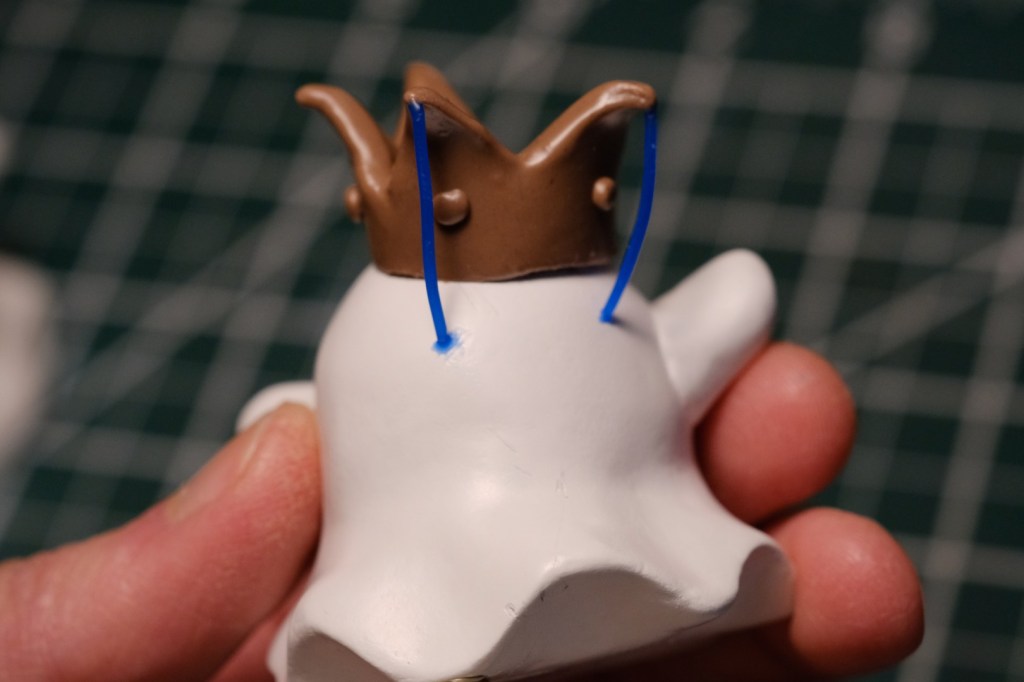
I used those same wax wires to create some extra air channels in the bottom of the ghost, again targeting places that seemed like they could trap air pockets.
As for the main sprue, I decided to move it to from the bottom-middle to the bottom-back and position the ghost at an angle. Previously, I just had the ghost sitting level (albeit upside-down), which meant that the ghost’s underside created a large surface for bubbles to be trapped against. Hopefully, by angling it, I can get the resin to fill the mold more thoroughly, with a more natural pathway for air to escape. See the image below to get a sense of how the resin will eventually fill the mold: entering though the brass tube, with air escaping through the blue channels.
If that picture looks weird, it’s because I took it in the other direction and then flipped it. Anyways… I attached the whole thing to a carboard base using a great big dollop of hot glue. An elegant solution? Nope! A long-term solution? Absolutely not! But it should hold long enough to get the mold poured.
I’m going to make a cylindrical mold here, since this will allow me to use rubber bands to exert even pressure around the entire circumference and close up the mold after I cut it. If the mold was rectangular, there would be more pressure on the corners than on the sides, which could cause warping. Not good!

To construct the mold box, I made a tube out of some thin cardboard cut from an empty model kit box. I taped up both the interior and exterior edges. This is important! You don’t want the silicone to leak out or you’re going to have a huge mess on your hands. I carefully positioned the tube around the ghost and secured it all around with hot glue. Very generous mounds of hot glue. Remember what I said about leakage?
I cut up pieces of the old mold to use as fill. The fresh silicone bonds with the old silicone to create a seamless mass, so you can use cut pieces to fill in empty space. This saves us from wasting a bunch of it unnecessarily. The stuff gets expensive! The only downside is that I won’t be able to use the original mold anymore (obviously). Sure it sucked as a mold, and I wouldn’t say I was attached to it in any way, and realistically I wasn’t going to use it anymore, but… I kinda liked it anyway. 👻
I let the silicone cure in a pressure pot at about 40 PSI. This should force out or shrink most of the bubbles, theoretically. I want to give this mold every advantage possible!
Aaaand… I dun goofed. Even with the extra fill, I ran out of silicone before I reached the top of the crown. The good news is that, even after the first batch of silicone cures, I can just add more on top. The bad news is that I didn’t have any more of that kind (Alumilite Amazing Mold Maker) on hand. What I did have was another brand (Smooth-On Mold Star 15 Slow). Will they bond with each other? Let’s find out! It’s experiment time!
Before I put the lid on the pressure pot, I took a second to watch the bubbles slowly rising up and popping. Kinda satisfying! A bit like popping bubble wrap, except this just does it on its own.
And the big reveal…
With the cardboard removed, the results look promising! And the two colors look nice together, not that that’s important. Of course, I won’t know for sure if there are issues until I cut it open. I haven’t had time for that yet, unfortunately. The second pour slowed me down. Unlike the Alumilite, which cured in 30 minutes, the Smooth-On takes four hours. Good if you want a long working time, but not so good if you’re on a roll and you just want to keep on going… 😩

Leave a comment