(can’t break what ain’t fixed! wait, that’s not how that goes…)
Last week I pointed out a couple of issues with the molds for Yume-chan. Well, guess what? I corrected them! The more mistakes you make, the better you get at fixing things, and I’d like to think that I’m pretty darn good at fixing things. Take from that what you will.
First off, let’s look at the arms and feet. In my last post I showed how I widened the inlets of the mold to allow resin to flow in without backing up, thus avoiding incomplete castings. I did a test cast with the modified mold, and here’s how it looks:

The sprues look like an absolute mess, but hey, you’re not going to see them after assembly! More importantly, the issue is fixed and these castings are bubble-free! I can breathe a sigh of relief.
The other problem I fixed was the fit between the shirt collar and the neck. Previously the neck had warped to the point where it no longer joined up to its receptacle. I revisited the clay prototype of the shirt and adjusted its collar, this time forming it around a copy of the final head cast so that I could be sure that the neck shape wouldn’t change unexpectedly.

Then, following the pattern that I used for the previous attempt at molding (which, might I add, worked great! It was the original sculpt that was flawed), I laid out the channels for the resin and built a new mold form:

Pour silicone, pressurize, wait for it to cure… I have to say, having gone through this mold-making process several times now, it’s starting to feel a bit routine. The risk here, as I have to keep reminding myself, is that when things start to feel routine, you stop thinking about them as much, and when you stop thinking about things, you start to make mistakes…
Well, more mistakes. You know what I mean. 🙂

Time to cut the clay prototype out of the mold! I always end up nicking the clay at this stage. Thankfully, it’s an easy fix. Just rub the clay around the cut and it goes away! I suppose that’s a benefit of using a non-hardening clay: you can always come back and make corrections later. Still, if I was more careful and cut a bit more slowly, I might be able to avoid damage entirely. Hmm, what was that about routines and mistakes?
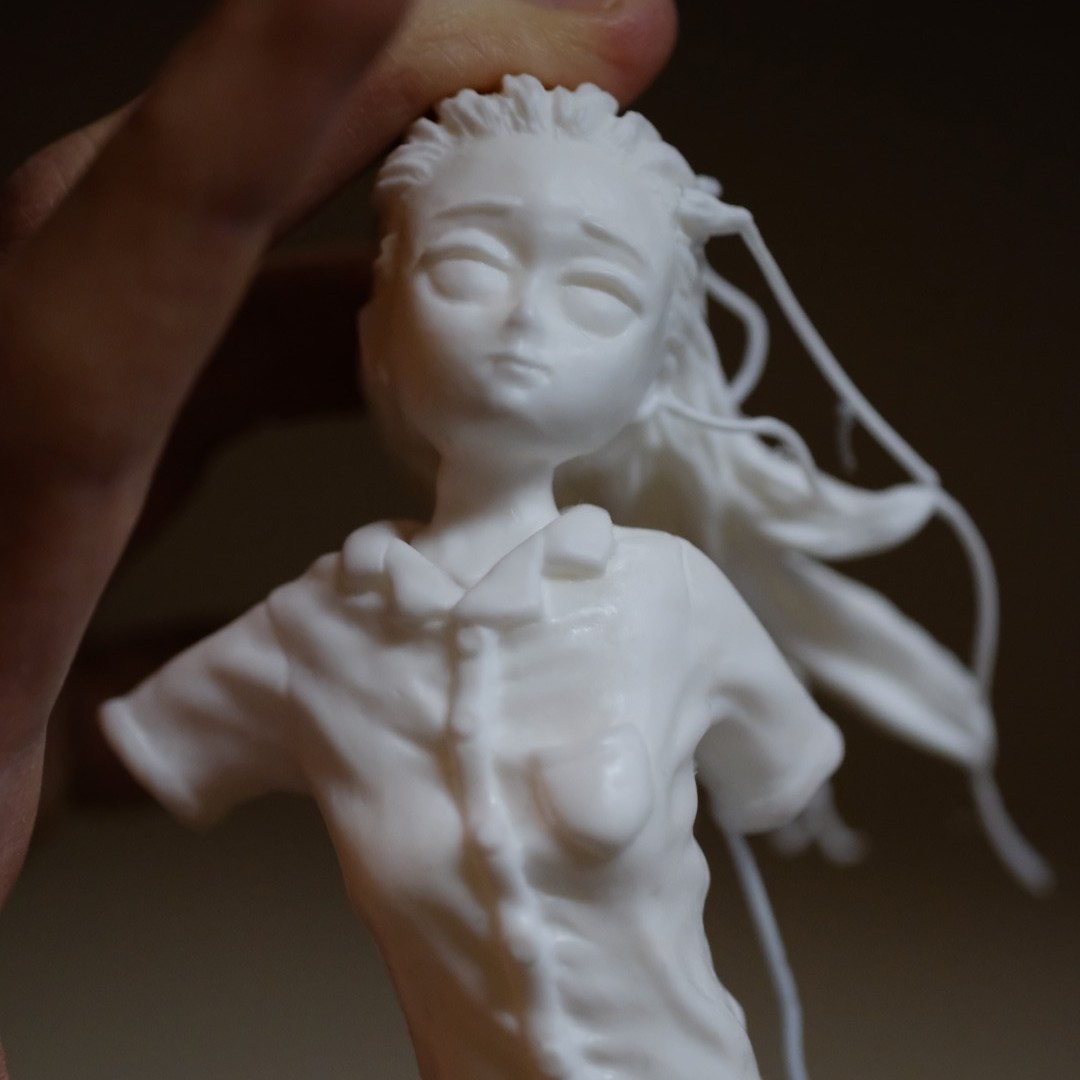
Once the mold was cut, it was time for a test cast! The cured piece looked good, but would it fit?

Below you can see the difference in shape between the original (right) and the corrected (left) versions. Very subtle, but a critical difference nonetheless!

Alright, time for the moment of truth!

Perfect fit! 😌 At least, close enough to perfect. Thank goodness. Part of me was dreading that, with my luck, I’d screw something up and have to do it yet again…

That’s it for now! I’ll assemble Yume-chan and fit her to the base this weekend, and if time allows, maybe even get a paint job started. Maybe not. We’ll see!
Leave a Reply